Getting Started with Message Time Plus
Ready to get started? Here are the first steps you can take to build, change, or enhance this instructional practice in your classroom.
Plan a primary literacy objective based on standards, curriculum scope and sequences, and/or recent assessments.
Choose one developmentally appropriate primary literacy objective to introduce or reinforce through the whole class mini-lesson. When selecting this objective, think about what reading (e.g., phonemic awareness, phonics, vocabulary, fluency, or comprehension) or writing (e.g., craft, content, or conventions) skill (e.g., short ‘a’ or punctuation) or strategy (e.g., visualizing to support comprehension or using a decoding strategy) you want to highlight. Most importantly, the chosen objective should be one that is developmentally appropriate for the majority of the class and based on whole class instructional scope and sequences. This should be a skill or strategy that will be taught in other ways that week and connects to grade level standards and in combination with formative assessment data (e.g., spelling inventories, conference records, or lists of the children’s strengths and needs). Engaging in this thoughtful, precise planning teaches the children that MTP is a time for focused, intentional, and meaningful learning, which results in more rigorous instruction and an increased proficiency in reading and writing for all children.
- Assemble the data, resources, and materials necessary to inform your objective selection.
- Review the collected documents along with your recent lessons and upcoming lesson plans to decide which reading or writing skill or strategy should be the focus of the MTP mini-lesson.
- Reflect on the appropriateness of the objective for the range of reading and writing abilities of the children in your class.
- Reflect on how you can teach to this objective and connect it to other areas of your literacy block (e.g., read alouds, writing mini-lessons).
- Consider the approaches for addressing the objective in the mini-lesson.
- Draft the objective, understanding that it might be reconsidered or revised as you fully develop the lesson.
Plan a whole class mini-lesson based on a primary literacy objective.
Pre-plan a mini-lesson that will teach the primary literacy objective to the whole class in an interactive and purposeful way. This lesson is brief and focused, and it moves the children away from individual scaffolding to whole group learning. Start by considering what the children should do to demonstrate their understanding of the objective and then use the MTP planning template to script out the exact language for the lesson. The whole class mini-lesson, reinforced by the repetition of the “why,” helps ensure that the children will walk away from the MTP lesson having learned a concept that is developmentally appropriate for all levels and that they can then practice and apply in their independent reading and writing. Listing all necessary materials (e.g., mini-white boards, markers, pocket charts), resources (e.g., word wall, anchor charts, child-made alphabet charts), and the method and order of their distribution/access is a helpful part of the pre-planning process. When you take the time to pre-plan the mini-lesson, instruction is more efficient and engaging, and the children are more successful in mastering the primary literacy objective.
Reflect on the lesson’s objective to determine the best way to present it to the children and what the children will do to demonstrate their understanding.
Consider several options for the children to try out the strategy or practice the skill during the mini-lesson. Select the option that will work best at this time in the school year.
Consider which materials you will use (e.g., white boards, sentence strips, pocket chart) and how you and the children will manage the materials during the lesson.
Decide whether a procedural lesson is needed prior to the MTP lesson to ensure that the children can effectively use the lesson materials.
Script out the language that you will use for the mini-lesson and rehearse it.
Think about how you can offer additional scaffolds for the children who may not be grasping the concept.
Think about how you will extend the task to challenge the children who learn it quickly and easily.
Make notes on how you will follow up on the mini-lesson in small group lessons and individual conferences.
Use a lesson planning template to guide the thoughtful planning and pacing of the lesson and rehearse language.
The lesson planning template is your partner in planning a successful Message Time Plus lesson. The template contains helpful prompts that focus your attention and support your thinking through the planning of each lesson component. When a draft of the lesson is completed, rehearse it. The rehearsal has a threefold purpose. It enables you to assess the timing of the lesson as a whole and of each individual component. It gives you the opportunity to hear what the language you have chosen sounds like to your own ear, which is often quite useful since the ear is a better editor than the eye. And it helps you build familiarity with the lesson, which will help the lesson run more smoothly.
Consider how you will teach the lesson to reach the variety of learners in your class.
Gather all of the lesson materials (e.g., sentence strips, etc.) and formative assessment data.
Follow the prompts and questions to complete the planning template.
Rehearse the language for the lesson, giving special attention to the think aloud and the mini-lesson.
Time the rehearsal to ensure that this lesson can be done within the suggested time frame.
Invite your coach or a colleague to observe the lesson rehearsal and to give you feedback.

Develop routines and procedures to promote participation and engagement.
Message Time Plus takes place in the whole group meeting area. To ensure comfort, enjoyment, timeliness, and an optimal learning environment, lesson procedures focused on expected responsibilities and learning strategies are taught, reviewed, refined, and practiced. The lesson procedures and learning strategies are explicitly taught in a series of full procedural lessons apart from and prior to the MTP lesson. The information from these procedural lessons is recorded on co-created anchor charts. The anchor charts are posted in the whole group meeting area in a place where all the children can see them. The procedural lessons address how the children transition from their chairs to the rug, where they sit on the rug, how to actively listen to the speaker, how to use their white boards, and how to engage in learning strategies such as turn and talk. Procedures are practiced, self-assessed, and reflected upon. Prior to each MTP lesson, one or more of these procedures are reviewed and reinforced with the support of the appropriate anchor chart(s).
Plan and teach a series of procedural lessons on the expected responsibilities and strategies to facilitate learning during the MTP lesson. In your lessons, you will address appropriate use of materials, the procedure of MTP, instructional strategies such as turn and talk, and expected behaviors on the rug.
Anchor charts will be co-created within the context of the procedural lessons. Display the anchor charts in the whole group meeting area where all the children can see them.
When planning an MTP lesson, select a specific responsibility or strategy that needs to be reviewed and reinforced based on your observations of past lessons. Explicitly address and review it before the MTP lesson.
Highlight peer models demonstrating the expected responsibilities.
Create a climate where risk-taking and effort are celebrated.
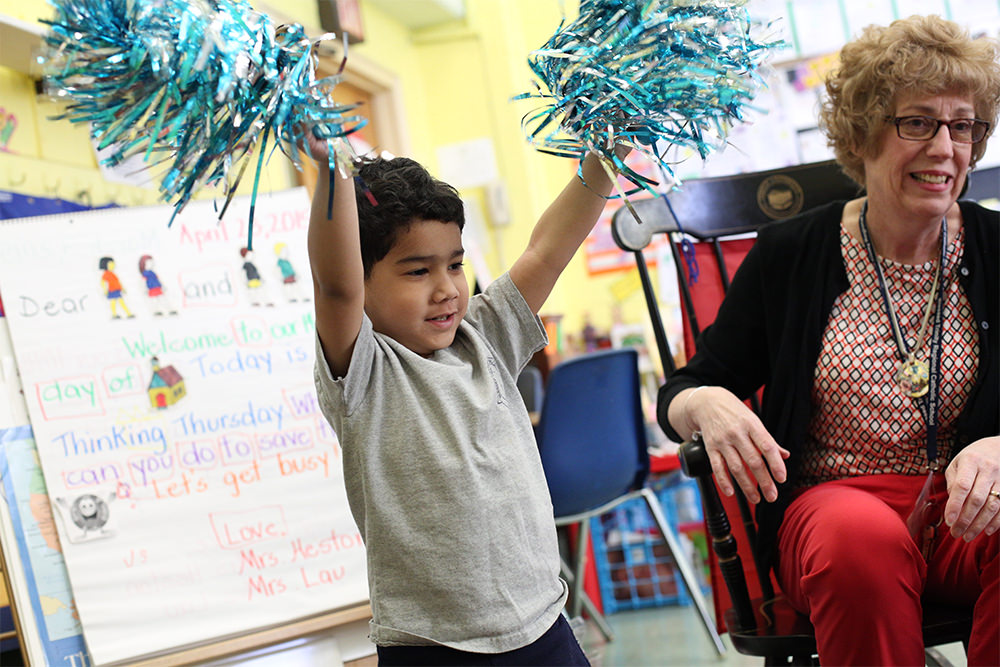
Risk-taking is encouraged during MTP by creating a community of learners in which all members of the classroom are valued for their individual thinking and contributions to the MTP lesson. In order to create this community, children are taught mini-lessons on how to give “wait time,” how to be active listeners, how to give specific encouragement, how to cheer on classmates, etc. The goal is that when each child finds an element of the message, s/he is empowered to think critically, knowing that s/he has the support and encouragement of the teacher and all classmates. Your role is to ensure that each scaffolding experience is successful and that the scaffolding experience guides, supports, and challenges the child. Make sure that the scaffolding doesn’t frustrate or embarrass the child or lack a learning opportunity. Supportive language should be used when guiding the child towards new learning, and you should encourage all children to openly support each other if this is not naturally occurring. Be sure that the child leaves the board feeling successful about what s/he found and learned. In a classroom atmosphere that supports risk-taking, children have daily opportunities to freely practice what they know while learning new skills and strategies along the way.
Create a classroom community built upon the shared values of kindness, responsibility, and empowerment.
Model and teach kindness through positive and empowering language and respectful interactions.
Teach a series of mini-lessons that reinforce procedures and responsibilities such as wait time and active listening.
Empower the children to take risks by viewing mistakes as learning opportunities and focusing on the learning process (not the product).
Teach the children cheers that acknowledge and celebrate each other’s learning.
Keep notes to better support you in scaffolding the children in ways that ensure a positive “at the board” experience.
Gather children in close proximity around an unlined white board or chart paper.
Gather the children in close proximity around the message board for every MTP lesson. This space is normally the whole group meeting area, and the children sit on the floor or rug facing the message board. It is important to leave approximately three to four feet in front for you (and/or the children that come up for scaffolding) to stand and also to allow for sufficient personal space between the children. You might consider assigning the children regular seats (e.g., next to their turn and talk partners) and possibly designating each of their seats with a piece of colored tape, a circle on the rug, etc. Once they are positioned in their spots, all children should have a clear view of the message board and the high frequency word wall. Gathering the class around the message board fosters a community of learners, while also increasing child involvement, engagement, and overall literacy learning during the lesson.
The composing of the message should be done on an unlined white board or piece of chart paper that is visible to all children and written on with a single, dark colored marker. The purpose for this is twofold. First, it allows the focus to be on the writing and the content of the message rather than on perfect handwriting or straight lines. Although you are modeling proper letter formation, handwriting instruction is not the focus of Message Time Plus. More importantly, writing the message on the board or chart paper allows it to be accessed again during the school day (or even longer if the message is written on chart paper). In this way, the message can be re-read and analyzed by children throughout the day (or longer) and referenced in other lessons. Enabling the children to see and access the message and focus on its content for a time period that extends beyond the original MTP lesson makes it more likely that they will learn to read it independently and internalize the strategies and skills that were emphasized during the lesson.
Create and use the whole group meeting area in your classroom for MTP.
Assign specific spots on the rug for children who would benefit from sitting at the front or next to each other.
Assign turn and talk partners who will sit near each other.
Teach procedural lessons to support rug expectations for MTP.
Co-create anchor charts to support the procedural lessons and post them where the children can see them.
Refer to the anchor charts during the “classroom culture” segment of the lesson.
If needed, practice writing on the MTP board to ensure that the message is visible to all of the children.
Use a dark colored (black or blue) marker to write the message and a bright color (e.g., red, orange, or purple) to mark what the children find.
Use non-serif manuscript writing, such as Palmer, to facilitate the children’s reading of the message.
Capitalize only proper nouns and the first letter of each sentence.
State the primary literacy objective and why it will help the children as readers and/or writers.
During the think aloud, you will include language that makes the primary literacy objective clear. Articulate how the objective will help the children as readers and writers by stating the “what” and the “why.” Referencing the primary literacy objective helps the children to focus on this objective and to describe which skill or strategy they should later walk away with and try in their own writing or reading. It may also set a purpose for listening to the message.
Rehearse the think aloud. Be sure that you have included the primary literacy objective and stated the reason that you selected the message’s topic.
Clearly state the objective in child-friendly language. Explain how working on this objective will help the children as readers and writers.
Briefly support the objective by providing examples from other reading and writing lessons and experiences.
In follow-up lessons, refer back to the MTP lesson objective and point out how the children are using it.
Write with appropriate pacing, handwriting, and conventions.
During writing, carefully form letters with appropriate pacing, modeling concepts of print and including proper conventions. You are modeling natural and correct writing that is legible and large enough for the children to see. In other words, you are not writing overly slowly or intentionally making mistakes. While you are modeling writing, you may occasionally stop to note certain writing behaviors, such as needing to move to the next line (sweeping) or adding spaces between words. Modeling writing behaviors and conventions for children demonstrates how they can apply these behaviors and conventions in their own writing.
While writing the message, you can articulate the writing behaviors that you are demonstrating, e.g., “I am at the end of the line, so I am going to the next line all the way at the other end.”
Use the message as a model and refer to it when conferring with children.
Have children reread each sentence after you write it.
After you write each sentence, have the children reread the sentence together, using a pointer or fingers to guide the rereading. This rereading allows them to put the group of words into a meaningful sentence and read it smoothly, accurately, and with expression. For this reason, it’s important that you fluidly guide the pointer (or fingers) under the sentence, and not point word by word. This may not have happened during the first time the children were reading along as you wrote, as their energy was focused on decoding words and listening to your feedback about their reading behaviors. This is the first of three rereadings of the message; the other two will involve the entire message at once rather than just one sentence at a time. This rereading enables the children to practice fluency and begin to comprehend the message.
Support and encourage the children to read each word in the message as you write it.
Announce that you have come to the end of a sentence, pointing out the ending punctuation mark.
Use the pointer to pace the children appropriately in reading the sentence. Since this is a first reading, it might proceed somewhat more slowly than the ideal pace.
Have children reread the entire piece after you’ve written it.
The second rereading happens after you have written the entire message. This time, you guide the children in a shared reading of the entire message. During this reading, you may gradually release responsibility to the children by providing less support. Since the goal of this reading is to maintain fluent reading of the message, you should still use a pointer to guide children, but you should not stop to give feedback on children’s reading behaviors. This gives the children the opportunity to hear the entire message read fluently, so that they can assimilate its overall meaning and work toward the speed and accuracy necessary for their own fluency development. At this point, the children should comprehend the message and be ready to look further into its elements in the next step of Message Time Plus. This rereading also reinforces both sight words and new Tier II/Tier III vocabulary.
Notify the children that they will read the entire message.
Use the pointer as a tool to facilitate smooth fluent reading.
Scaffold the children’s reading by reading along with them, ready to lead them through difficult words and phrases.
Establish a method for calling individual children to the board.
Establish a method for ensuring that no child has an unduly long interval between times when s/he is called up to the message board for scaffolding, so that all of the children get their fair share of turns. Typically, three children are scaffolded during one MTP session. It is difficult to accommodate more than three without losing the children’s attention and/or exceeding the allotted time for the lesson, and fewer than three will not allow the children to get turns often enough. While you will be pre-planning who you will call to the board for scaffolding, make the selection of the children engaging and surprising for them.
Call them to the board by pulling their “stick” (name written on a large craft stick) from one cup or basket and placing it in another cup or basket (often called the “go around cup”), starting the process over once all of the children’s sticks have moved to the second cup or basket. This allows the children to know that each of their names will be called in a set time period, eliminating anxiety and reducing questions such as, “When is it my turn? Will you pick me?” Instead of craft sticks, name cards (which can include pictures), clothespins, or name magnets can work the same way. In order for the children to feel comfortable watching classmates being scaffolded and celebrating the learning of others, it is important for each child to know that his/her fair turn is coming, too.
Prepare an equitable system of calling children to the board for scaffolding.
Introduce the system to the children and explain how it works.
Remind the children, as needed, that you are using a “fair” system and that everyone will get a turn eventually.
Encourage the children to celebrate whoever is called to the board. They might chant, “You go, Joey!” This festive interlude might help to quell feelings of disappointment about not being chosen.
Teach the children a repertoire of cheers for when an individual’s scaffolding is over. Allow the scaffolded child to select the cheer. Gradually add to the cheers over the school year.
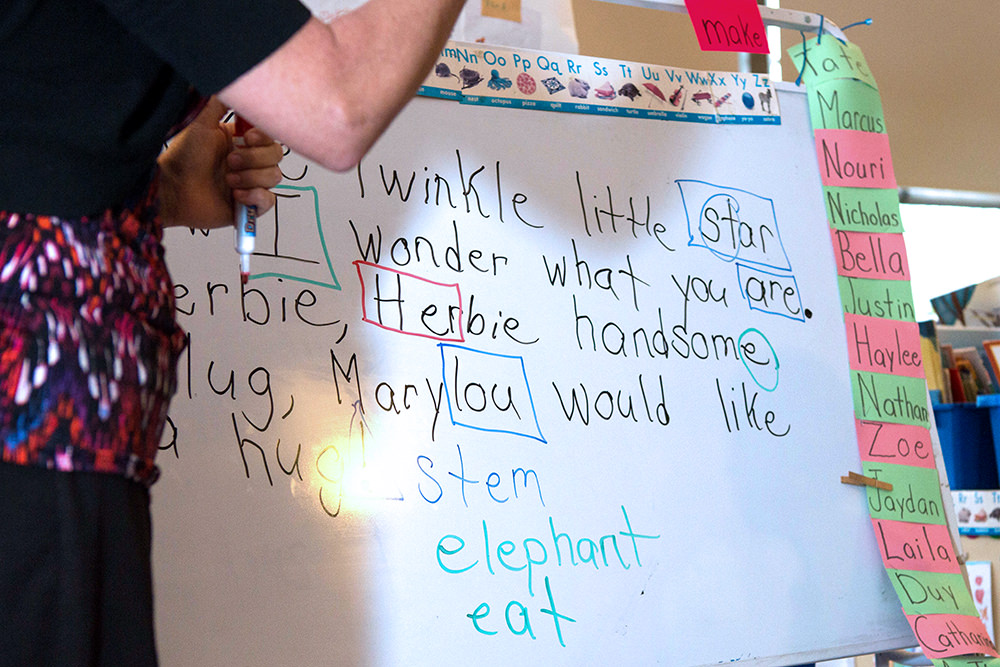
Mark a circle for letters or letter combinations, a box for words, and a triangle for punctuation.
After a child locates, points to, and names an element of the message, mark the element with a circle for letters or letter combinations, a box for words, and a triangle for punctuation. These marks should be made with a contrasting color, so that they stand out from the written text. It is important that the teacher (not the child) marks the board because the child’s focus should be on selecting an element of the message rather than on drawing the shape. The markings help the children focus on the elements of the message that they have selected. They also allow you to quickly review the learning with the children at the end of MTP lesson and help you with keeping anecdotal records of individual children’s performances.
Select a bright color (red, orange, purple) for marking the elements of the message that the children select.
Take care to not to interfere with the words in the message in any way that impacts the children’s ability to read them.
Record what the children select in your anecdotal records for future planning and instruction.
Have children share what they found with the class.
It is helpful for prekindergarten, kindergarten, and first grade children to state what they have found after they have pointed to it in the message. This demonstrates that they can identify the letter, word, or mark of punctuation verbally and that they can distinguish between a letter, a word, and a mark of punctuation. For example, a child who points to the word “the” should say, “I found the word ‘the’.” For a child who can easily distinguish between a letter, a word, a word part, and a mark of punctuation, it is not necessary to say the entire sentence (“I found the…”) each time, but it is still important for the child to read what was found as s/he points to it rather than just pointing to it and not saying anything. By stating what they have found, children are verbalizing what they know, in some cases showing that they can identify the element found (as a letter, word, etc.), and preparing for new learning.
Encourage the child at the board to announce what s/he has found in the message, if appropriate.
The announcement provides you with a little “think time” to consider how to scaffold the child’s learning from the identified item.
If there is a discrepancy between what is actually in the message and what the child says, be sure to record this information.
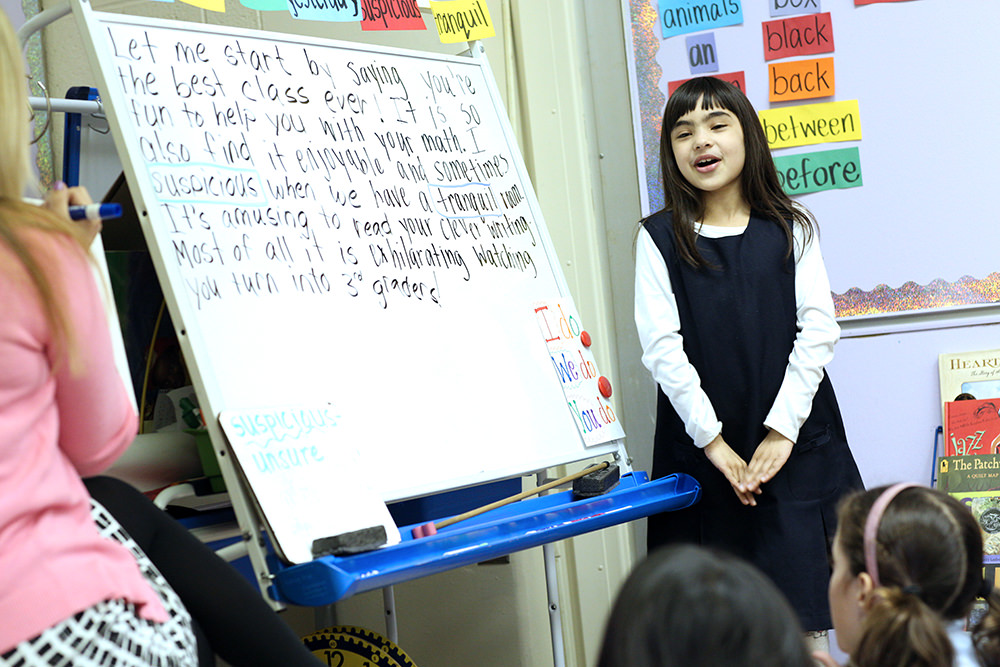
Engage all learners in a mini-lesson based on the primary literacy objective.
Engage all learners in an appropriate whole class mini-lesson that matches the primary literacy objective which was chosen using the methods and criteria specified earlier in this document. Start the mini-lesson by explicitly communicating its purpose, so that the children understand how it will help them as readers and writers.
The mini-lesson is planned to be brief, focused, and interactive, allowing all learners to be involved. It is carefully designed to engage the children, so that they will want to participate. When planning and implementing the mini-lesson, consider all learners in the room by using visual, auditory, and kinesthetic techniques. Vary the use of resources such as anchor charts, word walls, small white boards, the bottom of the MTP board, and sentences strips. For example, if you have planned a mini-lesson on words with -ed endings, you might ask the children to record all the words in the message that end with -ed, discuss the meaning of this suffix in context, and then launch into a short lesson in which they sort the -ed words into categories based on how they sound (i.e., like “ed” as in blended, like “d” as in shaved, or like “t” as in walked).
Conclude the mini-lesson exactly the way it started, i.e., by explicitly reiterating its purpose. After the mini-lesson, reflect upon whether the primary literacy objective was met and plan future instruction for continued learning on that literacy objective.
Assemble all of the materials that you need to teach your mini-lesson in the MTP area.
Before the lesson, distribute the materials (e.g., white boards, markers, etc.) that the individual children may need. Have the children store them in way that will not distract them.
Tell them what you will be teaching them and how this will help them as readers and writers.
Provide adequate time for the children to try out the skill or strategy, understanding that you will be following up in other literacy lessons.
Observe the children’s attempts and jot down anecdotal notes, if possible.
Conclude by again telling the children what you taught them and how it helps them as readers and writers.
Prepare and guide children to re-read the entire writing piece.
After the writing and reading of the message and the completion of the scaffolding and mini-lesson, ask the children to reread the entire message. This is the third and final rereading, including the initial rereading that was done one sentence at a time. In this final reread, the children are doing the reading of the message and you are assisting only when necessary to support the flow and pronunciation of the text. You may offer some quick instructions or “tips” around fluency to support the children’s ability to read the message with accuracy and expression, so that the children can learn to apply these fluency lessons to their own independent reading. The purpose of this final rereading is not only to increase fluency, but to also increase comprehension of the message. Readers do not have to concentrate on decoding words in this third reread because they have already had the opportunity to do so. Instead, they can focus their attention on what the text means and get a chance to see their newly-learned skills and strategies used within the context of a meaningful message.
You can also use this time to assess the children’s fluency strengths and needs in order to plan future instruction. This final rereading helps word recognition become more automatic, rapid, and effortless, leading to increased comprehension. It also solidifies the learning that the children have done by putting it into context.
Announce the final reading of the message with fanfare and pageantry.
Give specific instructions to the children to ensure fluent reading (e.g., “There is a question in this message. Let me hear your voice rise.”).
Use the pointer to help the children maintain a pace appropriate to the message.
Comments
No comments have been posted yet.
Log in to post a comment.