Environment: Print
Authentic print in a classroom reflects what is valued and important to the community.
It offers children resources they can use as they grow as independent learners while also celebrating their efforts and making their learning public. Authentic print is written in “real” teacher or children’s handwriting. The content of what’s written is meaningful to the children. Its purpose is to anchor the children’s learning of strategies, skills, and procedures they need to be successful readers and writers. By engaging in the process of creating authentic print during lessons and interacting with it to support the reading and writing children do on their own, children internalize the meaning of print, are invested in using it for support and, as a result, are more likely to apply the content. In contrast, commercial print is developed by a poster company or bought at a teacher supply store. The content is not created with the children, and therefore is not as meaningful. A child-centric, print-rich classroom contains a variety of different types of displays such as anchor charts, word walls, labels, visual supports, and children writing and should reflect current teaching and learning.
Authentic Print
“Commercial products…do not invite engagement, wonder, or imagination, making them that much easier to be ignored at the conscious level. The image of the learner embedded in these materials is that of a consumer of information who needs to be entertained, rather than a child who is curious and capable of creating and contributing to the culture within this environment.” - Patricia Tarr, Consider the Walls
Commercial print often looks “cute.” It may contain little animals or pictures that you think children find appealing. However, the opposite is actually true. Authentic displayed writing is much more powerful and meaningful for children. Therefore, use your walls purposefully by displaying only print and charts that you created in front of or with the children.
When creating charts and displays with the children in your room, be thoughtful about how you create them in order to broaden your children’s understanding of the writing process. You may choose to do the writing or you might have children do some of the writing. You may choose to come up with the language for the chart or you might make it a shared decision. You may decide to use the chart-making activity as an opportunity to teach explicit phonics skills or you may not. In other words, consider your goals and match them to the different types of writing available to you.
A print rich environment may also include connections to a child’s native language. English language learners benefit from increased exposure to child created print, language, and visual supports. Being aware of native language influence will allow you to target your shared and interactive writing instruction.
| Type of Writing | Who holds the pen | Who comes up with the ideas | Why choose this method |
|---|---|---|---|
| Modeled Writing | Teacher | Teacher | If children need to see an example of an experienced writer demonstrating how to generate ideas, how to compose a text, how to revise and/or how to edit |
| Shared Writing | Teacher | Teacher and children | If you want children to share their ideas and their understandings while translating some of their responses in order to capture their thinking clearly and precisely |
| Interactive Writing | Teacher and children | Teacher and children | If you want children to share their ideas and understandings while also working on specific phonics and spelling skills |
Guidelines for Creating Anchor Charts
“I’ve found that often we use our dry erase or chalkboards to chart things, but then erase them at the end of the day. For many kids, this information just goes into short-term memory. By creating, displaying, and referring to anchor charts across all subject areas, I believe we can help kids transfer ideas and ‘anchor’ them into long-term memory.” - Debbie Diller, Spaces & Places
Anchor charts are one of the most effective, engaging, and child-friendly ways to support instruction and reinforce key concepts, skills, and vocabulary. A great anchor chart can be like adding another effective educator to a classroom. Children can review the steps of a specific skill, strategy, or process during guided or independent practice using an effective anchor chart. When these are created with the children in your classroom, they can be used to capture their thinking and learning and also serve as a resource for children as they become increasingly independent learners.
Create essential anchor charts.
Create anchor charts for ideas you want children to remember or information that they might have trouble remembering. There doesn’t need to be an anchor chart for everything.
An anchor chart that helps children remember different strategies for decoding an unfamiliar word is helpful. An anchor chart that lists the names of the parts of a book (cover, title, etc.) is not necessary if the children already know this information.
Create anchor charts with your children. Children learn more about the concept on the chart if they are involved in making it, rather than just reading ones bought from the store. Making the chart becomes a part of learning the information.
If you are teaching your readers about character traits, instead of purchasing a store bought list, create one with your children. When you read a book in which a character exhibits a trait you want your children to learn, add the trait to the anchor chart “Character Traits” and provide the example from the book to anchor their learning.
When creating anchor charts, use examples to illustrate the ideas.
If you are making an anchor chart of informational text features, beside each feature, use a real-life example (an image or a quote) from a book that you have shared with your children.
Use pictures, drawings, children’s names, quotations or photos. Personalizing the anchor charts will lead to greater child investment. Pictures will help early readers and English language learners.
If you are creating an anchor chart that lists feelings, take a photograph of one of your children making an expression that reflects that feeling (e.g., surprised or angry). These photographs will illustrate the vocabulary word and personalize the chart for the children.
Anchor charts should be built over time.
- If you are teaching a big concept such as comprehension strategies, you might consider adding one idea to the anchor chart each time you teach a strategy. In this way, the anchor chart reflects your current instruction.
Display anchor charts in the area of your classroom where they make the most sense. Refer to them.
If your class has created a “Book Handling Responsibilities” anchor chart, consider hanging it in your classroom library. Also display it at eye level so children can read it easily.
Refer to your anchor charts during the natural course of your instruction. The more you model using them for reference, the more the children will use them for their own independent thinking and work.
If you are conferencing with a child who says they are done with their writing, you can refer to the “What to do when you think you are done” chart and discuss next steps.
Retire anchor charts.
Keep up the anchor charts that are needed and reflect current learning. Classroom resources should be relevant so that they will be used by the children. Retire anchor charts when they are no longer current to life in the classroom so they don’t become decorations. But what can you do with them? Throwing them away seems like a great loss of learning. Here are some tips:
Photograph Them - Take pictures of your retired anchor charts and place them in a photo album for children to peruse. You might also give each child a copy of the photo for them to place in their individual reading and/or writing notebooks as resources.
Laminate Them - You might create a big book of retired anchor charts that children can reference when they need to or read for fun when they are in the classroom library.
Type Them - Create a document with the information contained on the anchor chart and give them to the children to use as resources when they read and/or write. Or send them home so families can see what learning has taken place.
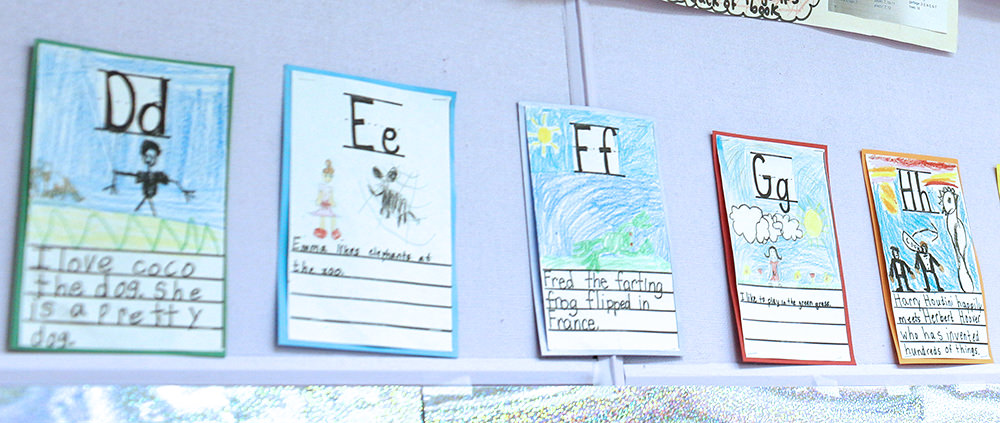
Guidelines for Displaying Children’s Writing
Displaying children’s work sends an important message: as your teacher I value your work and your efforts; this is your learning environment. Research indicates that children (especially ELLs) will be more apt to look at their own work over commercially created materials. Remember children in early elementary classrooms are growing each and every day as writers. Their print is a work in progress – perfection should not be the goal. When you display children’s writing, ensure that children feel empowered by the experience of seeing their work on display by taking these few steps:
Designate a space for each of your children. Allow each child to select the piece they want to display. Ask them to record a note that explains why they chose that piece. Did they try out a new strategy for the first time? Did they write about something particularly meaningful? Display this as well as the writing piece. (If the children are too young to write their own note, let them dictate it to you.)
Display children’s works-in-progress. Encourage children to celebrate the writing process and to recognize the gains they are making as young writers.
Display the children’s writing at their eye level. Children will naturally be eager to read their own and their peers’ work over and over.
Avoid the red pen. Displaying children’s work that has your writing, grades, or your corrections on it undermines the children’s sense of ownership over their work. If there are errors, or teaching points you want to make, do it in the children’s writing folders, not on their displayed writing.
Rotate the children’s writing. Once their published writing is retired from display, create a basket for the library entitled “Classroom Authors” and store their work there. This will send the message that their writing is authentic and has gone through the publishing process as has the work of the other featured authors in your classroom library.
High Frequency Words
High-frequency words—words that are very common in English and that may be regularly or irregularly spelled—are often known as “sight words.” However, this is a misnomer. These very common words are more aptly called high-frequency words and are better not taught by sight or memorization. According to reading research, high-frequency words should be taught through graphophonemic analysis; that is, analysis in which we draw children’s attention to the letter-sound relationships in high-frequency words the way we would with any words we were encouraging a child to read phonetically (Ehri, 1978).
Principles for Teaching High-Frequency Words
The following five principles for teaching high-frequency words, proposed by the reading researchers Nell Duke and Heidi Anne Mesmer, can help educators take a more research-based, graphophonemic approach to high-frequency word instruction:
“Teach high-frequency words along with phonemic awareness, individual letter-sound relationships, and a concept of word” (e.g., Flanagan, 2007), (Duke and Mesmer, 2016).
Without some sense of phonemic awareness, individual letter-sound relationships, and a concept of word, children cannot efficiently learn high-frequency words. Children should be learning high-frequency words and decoding simultaneously, rather than learning large amounts of high-frequency words before learning to decode.“Ask students to use graphophonemic analysis to read high-frequency words” (Ehri, 2005), (Duke and Mesmer, 2016).
Ask students to use what they know about phonics to figure out parts of or all of a high-frequency word. For example, an emergent reader who knows consonant sounds could be asked to recognize the /g/ in “go,” or a beginning reader who can read short vowel words and consonant blends, could be asked to “sound out” “and,” /a/-/n/-/d/. Note: this can and should be done for words with irregular letter-sound relationships as well. For example, when teaching “was,” say “w” says /w/, the “a” says /ŭ/, and the “s” says /z/. Through experiencing this kind of graphophonemic instruction of high-frequency words, children build a phonological representation of the word, which supports their learning of the word, a process known as “orthographic mapping.”“Teach high-frequency words in groups that have similar patterns” (Duke and Mesmer, 2016).
Group together high-frequency words that “break rules” in comparable ways. For instance, some, come, above, and love benefit from being taught together as a group with a similar pattern, rather than individually in isolation as anomalies.“Use high-frequency words to help children decode new words” (Duke and Mesmer, 2016).
In a study that compared children who were taught high-frequency words with and without attention to letter-sound relationships, the children who were taught high-frequency words with attention to letter-sound relationships were able to use their knowledge of how to decode the high-frequency words they had learned to learn new words (Ehri, Saltow, and Gaskins, 2009). For instance, such a graphophonemic approach to sight-word instruction could enable students to realize they knew how to read the unfamiliar word “fen” because they could read the high-frequency word “then.”“Practice reading high-frequency words in sentences and books” (Duke and Mesmer, 2016).
Children need to analyze high-frequency words individually, paying close attention to letter-sound relationships, and they also need to read those same words in sentences and books. Reading high-frequency words in sentences and books helps children recognize them readily, and leads to the important understanding that such words are meant to convey meaning.
Regularly Spelled and Irregularly Spelled High-Frequency Words
When we teach high-frequency words through graphophonemic analysis, as reading research recommends we do, then we need different techniques for teaching different kinds of high-frequency words, since more “regular” high-frequency words—like “can”, “not,” and “did”—have obvious letter-sound relationships, and more “irregular” high-frequency words—like “said,” “are,” and “where”—have less-obvious letter-sound relationships. Below are some suggestions for techniques for teaching both regularly spelled and irregularly spelled high-frequency words.
Words that are regularly spelled should whenever possible be integrated into the class’s existing phonics scope and sequence. For example, regularly spelled high-frequency words like “if,” “am,” and “at” should be introduced when children are learning short vowel spelling patterns, and regularly spelled high-frequency words like “her,” “for,” and “or” should be introduced later when children are learning r-controlled vowels. Similarly, regularly spelled high-frequency words with two syllables—like “after”, “never,” and “better”—should be taught when other multisyllabic words are being taught.
Irregularly spelled words with similar spelling patterns can be taught in groups, even if the pattern they have in common is irregular, as is mentioned in Duke and Mesmer’s principles for teaching high-frequency words. An example of such a grouping is “some,” “come,” and “done,” where o-e spells short u. Groups of irregularly spelled high-frequency words can then be added to phonics or spelling lessons, where they most optimally make sense or relate to particular patterns.
Irregularly spelled words can be integrated into phonics instruction when children learn the regularly spelled letters in the word, such as teaching “they” and “their” when students are learning the digraph “th,” in which case students would recognize “ey” in “they” and “eir” in “their” as new sounds to be learned, while also becoming familiar with the diagraph “th.”
To summarize the differences between when to teach regularly spelled and irregularly spelled high-frequency words remember:
Regularly spelled high-frequency words—e.g., obviously decodable high-frequency words—are best taught during phonics instruction, with the phonics patterns they best align to.
Irregularly spelled high-frequency words—e.g., difficult to decode high-frequency words—are added in gradually as students learn to decode, with as much alignment as possible between their letter-sound relationships and the phonics patterns being taught.
When looking at a common list of high-frequency words, such as the Dolch or Fry lists, and when evaluating a phonics scope and sequences, it makes sense to determine which words are regularly spelled and can be easily decoded and which words are irregularly spelled and will need more explanation to understand at the sound level. The big change from previous approaches to high-frequency words is to remember to have children analyze the sounds of irregularly spelled high-frequency words, just as you would ask them to analyze the sounds of regularly spelled high-frequency words. For example, when introducing what, instead of telling children to simply memorize it, we would explain that the wh says /hw/ and the at says /ot/, enabling them to make a connection between the letters and the sounds which will help them to better remember the word. Perhaps also discuss how the “a” sound is associated with different sound here than in other “a” words they may know. Along these same lines, when children practice both regularly and irregularly spelled high-frequency words independently at centers or during work time, they can better learn them not by chanting them, but by sounding them out as they study them, perhaps voicing each sound in the word quietly as they work with the word.
The Read-Spell-Write-Extend Routine
In addition to integrating high-frequency word instruction into the scope and sequence of phonics instruction, teachers can also consider using Wiley Blevins’ approach to helping children remember high-frequency words by using a word-learning routine that activates the three ways words are stored in the brain: by sound, by meaning, and by letters. Blevins’ routine, known as Read-Spell-Write-Extend, is summarized below:
- Read an underlined high-frequency word in a sentence: The dog is big.”
- Spell the high-frequency word and encourage children to identify each of the individual sounds/phonemes in the word: b-i-g. “What is the first sound in the word big? What letter do we write for the ‘b’ sound?”
- Have children write the word repeatedly in the air, on white boards, or on paper, as they spell it aloud. Model how to do this by saying, “I will say each sound in big as I write it: /b/-/i/-/g/.”
- Make connections between the word learned and other words children have learned by placing the new high-frequency word next to words with similar sounds on a wall, or have children use sentence frames with partners to generate other sentences using the new word. “With your partner finish this sentence: I see a ______dog.”
Working Towards Research-Based Practices in High-Frequency Word Instruction
Implementing a research-based approach to teaching high-frequency words—one that prioritizes graphophonemic analysis—entails, as we have seen, prioritizing the teaching of letter-sound relationships in the instruction of high-frequency words, as well as the integration of high-frequency word instruction into the scope and sequence of phonics instruction. With these principals in mind and some strategies for instruction—such as the Read-Spell-Write-Extend routine—we can make our high-frequency word instruction as impactful and useful as possible for all of our students.
We can also use these new, more phonetic approaches to teaching high-frequency words as an opportunity to move away from outmoded approaches to high-frequency word instruction, approaches wholly dependent on memorization, which did not provide all students with adequate opportunities to build the phonological representations of high-frequency words needed to know a word instantly. With a more phonetic approach to high-frequency words, there will be more opportunities for every student to develop the crucial phonological representations necessary for storage and fast retrieval of words when reading.
Works Cited
Blevins, Wiley. A Fresh Look at Phonics, Grades K-2: Common Causes of Failure and 7 Ingredients for Success. Corwin Press, 2016.
Duke, N and Mesmer, A. (June, 23. 2016). Teach “Sight” Words as You Would Other Words. Literacy Today, International Literacy Association.
Ehri, L.C. (1978). “Beginning Reading from a Psycholinguistic Perspective: Amalgamation of Word Identities.” In F.B. Murray, (Ed.), The Development of the Reading Process (International Reading Association Monograph No. 3). Newark, DE: International Reading Association.
Ehri, L.C. (2005). “Learning to Read Words: Theory, Findings, and Issues.” Scientific Studies of Reading, 9(2), 167–188.
Ehri, L.C., Satlow, E., & Gaskins, I. (2009). “Grapho-phonemic Enrichment Strengthens Keyword Analogy Instruction for Struggling Young Readers.” Reading & Writing Quarterly: Overcoming Learning Difficulties, 25(2–3), 162–191.
Farrell, L, Hunt, M., Onsenga, T. (2019). A New Model For Teaching High-Frequency Words. Reading Rockets.
Flanigan, K. (2007). “A Concept of Word in Text: A Pivotal Event in Early Reading Acquisition.” Journal of Literacy Research, 39(1), 37–70.
Miles, Katharine Pace, Gregory B. Rubin, and Selenid Gonzalez‐Frey. “Rethinking Sight Words.” The Reading Teacher 71.6 (2018): 715–726.
Word Walls
Grouping words on walls to support reading, writing, spelling, and vocabulary instruction is a well-established educational practice. There are many different kinds of word walls with many different purposes. However, word walls can be roughly divided into two major groups: word walls used to support decoding and spelling, and word walls to support vocabulary development. Within these two groups of word walls, there are a number of specific types of word walls. By looking more closely at some of these specific types of word walls, we can better understand how each of them supports different aspects of language arts instruction.
Word Walls that Support Spelling and Decoding
Word walls that support spelling and decoding include traditional word walls, sound walls, and modified sound walls.
Traditional Word Walls
Traditional word walls are usually arranged alphabetically with words placed under the letter they begin with. On these walls teachers frequently place high-frequency words, words children in their writing have difficulty spelling, words that serve as examples of spelling patterns, words with the same letter clusters (stew, stop, etc.). Because traditional word walls work for such a variety of words—and can be used to support spelling in writing and decoding in reading—they need to be set up in such a way that their purpose and system of organization is very clear to children, and they need to be updated frequently, as the class learns new words and moves past the need to master old words.
One effective kind of traditional word wall that is effective for supporting the learning of phonics and spelling patterns is a word family or phonogram wall, in which words with the same onset or rime are grouped together (cat, hat, rat, fat, etc.), helping children to recognize a phonics and/or spelling pattern that they can then generalize to other words with the same pattern in their reading and writing.
Sound Walls
Sound Walls organize groups of words by their initial sound and/or their medial sound, rather than by letters like word walls. The premise behind the use of sound walls rests on the idea that language is composed of the articulation of different kinds of sounds, and that learners perceive words by moving from speech to print, not from print to speech. From this speech-oriented perspective, word walls—with their emphasis on arranging words by letters—do not make as much instructional sense for beginning readers as words arranged by sound.
Sound walls are typically divided into consonant walls and vowel walls, with the former used mostly for the initial sounds in words and the latter used for the medial and the initial sounds in words. To organize the sections of the wall, a picture and/ or a key word is used to represent a sound under which words with a comparable sound are placed as they are learned. For example, under the picture of duck and the word duck would be words beginning with the /d/ sound. Because sound walls were originally associated with teaching children who needed support hearing and manipulating phonemes, they may also have photos demonstrating where in the mouth particular sounds are articulated. However, such photos are likely not necessary for teachers using sound walls with all children.
For teachers using sound walls with all children, perhaps what is most salient about them is how they help children focus on the relationship between sounds and letters, a practice that has the potential to strengthen children’s capacity for orthographic mapping (i.e., their ability to match particular sounds to particular letters). Sound walls can also help children recognize that there are different ways to spell the same sound. For example, when teaching long /a/, it could be useful for children to see all the different ways of getting a long /a/ sound clustered together (a-e, ai, ay) to recognize how they all spell the same sound.
Modified Sound Walls
Marcia Invernizzi and Jennifer Palmer, a reading researcher and a teacher, propose a kind of word wall for vowels that has many of the attributes of sound walls, but without all the complicated distinctions sometimes associated with vowels on sound walls (Palmer and Invernizzi, 2015). In Invernizzi and Palmer’s model summarized below, the wall is divided into five columns, one for each vowel:
- Keep the wall simple with few visual distractions to enable children to find words.
- Underneath each vowel, list key words (e.g., hat, had, say, made for “a”).
- Separate short-vowel, long-vowel, and vowel-digraph patterns in each column.
- Each time a new word is added to the wall, have children compare its pattern to other words in the column (e.g., connecting -aid to -ade, and comparing them to -ad).
- Encourage children to compare and contrast the words, and use them as a decoding strategy (e.g. using the word made to help figure out the ade in trade).
Word Study Walls
These walls are a space dedicated to the study of words and their components. They may, in the lower elementary grades, be organized alphabetically, or, in the upper elementary grades, by concept covered (long vowel patters, diagraphs, contractions, etc.). In classes with emergent bilinguals and bilingual children, these walls may be used for separate languages or to show the relationship between words in two languages, such as cognate walls.
Word Walls that Support Vocabulary Development
Word walls that support vocabulary development include morphology walls, word banks, collections, and general vocabulary walls.
Morphology Walls
These walls are used in the upper elementary grades to learn words associated with roots, prefixes, and suffixes, enabling children to learn the meaning of a group of morphologically related words, and to transfer that knowledge to other words they encounter with similar morphology. For example, on a suffix wall, words like “enlighten” and “frighten” might be arranged under the suffix “en,” meaning “become.”
Word Banks
Word banks or groups of words related to a particular topic help children see and learn vocabulary better by being exposed to a group of connected words, whose meaning is relevant to a subject they are studying. For example, a class reading about plants might have a word wall with all the different new words they are learning about plants. Such topical word walls can be organized in ways that highlight the relationships between concepts or ideas taught, further extending the wall’s knowledge-building value. For instance, in the case of a plant word wall, words learned that are related to leaves’ role in photosynthesis could be grouped separately from words related to roots’ role in photosynthesis.
Collections
Collections are a more interactive variation of word banks, developed by the reading researcher Elfrieda Hiebert. Hiebert suggests that teachers make such collection-focused word walls for topics they are teaching, and invite children to contribute to the walls on an ongoing basis through collecting words during their reading on the topic. For example, in a unit on plants and where they grow, a teacher makes a word wall of terms related to the topic, with picture cards for some of the more esoteric headers, such as fungi, algae, and lichen. Then over the next two weeks as children read more about plants, they add words from their reading to the correct section of the word wall, and, as a class, discuss the relationships between the words posted on the wall. It is easy to imagine a comparable use of a collection-focused word wall for deepening children’s understanding of the relationship between vocabulary in a whole class novel as well. With Hiebert’s collection-focused approach to word walls, a word wall becomes a tool for building knowledge about a topic or a text, and for learning words through recognizing the relationships between them.
General Vocabulary Walls
General vocabulary walls have the attributes of all three of the vocabulary walls we have mentioned above, and may be used in classrooms as an opportunity to support the growth of word consciousness by all learners in general or as a specific strategy for supporting emergent bilinguals just learning new English words. Like traditional word walls—with their wide range of uses—general vocabulary walls need to be carefully organized and maintained, so that children know the purposes for the words on them and the system by which they can find the words they want.
Making Word Walls Interactive
The most successful implementations of word walls are interactive ones, in which the teacher uses the word wall frequently as a teaching tool and children use it frequently as a resource for their reading, writing, and spelling. This type of purposeful use of word walls needs to be taught and modeled through opportunities for children to interact with and use the words on the wall. There are a number of ways to ensure this type of interaction occurs:
- A teacher can show children how to use words on a traditional word wall to help them decode other words, and then during reading groups have children practice this strategy before using it when reading independently.
- A teacher can explain how to use words on a traditional word wall to support writing, and then holds children accountable during Writing Workshop for doing so.
- When a word is being placed on a wall, a teacher can ask children to figure out where it goes (in a particular spot) and why it goes there. This challenge to “place” the new word correctly on the word wall—and explain why one picked the location one did—is a particularly worthwhile activity for sound walls, where children can be asked to explain how the new word fits with words of a similar sound, with comparable or different spelling patterns. Similarly for vocabulary walls, when placing a new word on the wall, children can be asked to describe why it should be grouped with the words they believe it best goes with.
In short, what we do as teachers to make our word walls interactive truly makes them a classroom learning tool, not just a decoration. And it is precisely the interactive quality of a classroom word wall—fostered by the teacher’s regular use of the word wall—that will finally determine the instructional value of the word wall, whether it is being used for the purposes of decoding and spelling or for the purposes of vocabulary development.
Works Cited
Durham, Dawn. Sound Walls: Using the Science of Reading to Spell. September 13, 2018. (PowerPoint)
Hiebert, Elfrieda H. Teaching Words and How They Work: Small Changes for Big Vocabulary Results. Teachers College Press, 2019.
Palmer, Jennifer and Marchia Invernizzi. No More Phonics and Spelling Worksheets, Heinemann: Portsmouth, NH, 2015.
Williams, Cheri, et al. “Word Study Instruction in the K–2 Classroom.” The Reading Teacher 62.7 (2009): 570–578.
Word Banks
A group of words that share the same category or feature can be grouped together to form a word bank. There are many categories of words, such as theme words or vocabulary words, that children need to learn. Post vocabulary words throughout the classroom and separate them from the high frequency word wall. Build banks of meaningful words over time through read alouds and content area work. Group words together in ways that make sense to children. Think about how word banks can support children to learn new words and use them in their writing. Refer to the word banks often and teach children to use them.
Group tier 2 words together in related categories. Think about how children might use them to add color to their writing. Some ideas for vocabulary word walls might be, “Ways animals move” (slither, leap, gambol, etc.), “Ways to speak” (whisper, bellow, declare, mutter, etc.), or “Words that describe people” (charming, witty, brooding, blue, etc.).
Post tier 3 vocabulary words to support children reading and writing in different content areas. For example: “Animal Habitat Vocabulary” (biome, environment, camouflage, savannah, arctic, burrow, etc.) or “Words for Community People and Places” (chef, ladle, firefighter, hydrant, avenue, etc.).
Word banks are also a wonderful support for ELLs and can be organized around a number of key concepts (number concepts, phonetic sounds, new academic words, language conventions, conversational phrases, and/or writing structures).
Contextualize the words that you post. Add picture support, definitions, or use the word in a sentence to help children remember word meanings. Use photos of your children, copies of illustrations from books, or drawings to illustrate the vocabulary words that you post. This is especially helpful for beginning readers and emerging bilingual children.
Comments (27)
Log in to post a comment.